
Spring ‘Roll’ Crafts 5: The Blooming Tree
Today I will show you how you can make a lovely flowering tree using a paper towel roll, a doily, some cardboard and stickers.
Materials:
- paper towel roll
- doily
- cardboard
- white craft glue
- scissors
- cutting blade
- glue gun
- acrylic paint
- flower stickers -I used Cherry Blossoms
- regular acrylic or dimensional paint of the following colours: pink & 3 shades of green
- gold glitter glue or dimensional paint
- wood-like design self-adhesive drawer liner
Let’s begin…

Step 1 – Cut the paper towel roll to the height that you need. This all depends on the size of your doily.
Step 2 – Adhere doily to cardboard using the white craft glue; cut cardboard following contours of doily.
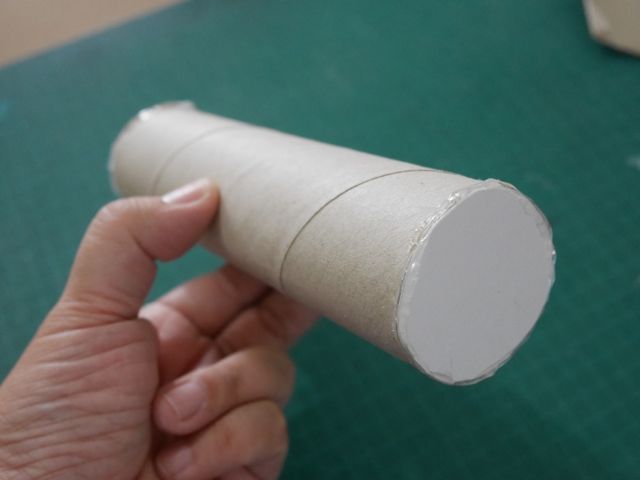
Step 3 – Make end covers and attach to roll using a glue gun.
*Note: It is important to put something inside the roll to give it a little weight; otherwise, it’s too light to stand on its own. It could easily be blown away by the wind. So, just before you glue on the end cover, you can put in a little bag of sand or perhaps some Mung beans to give it a little jiggle.

Step 4- Cut a slit in the middle of end cover all the way through 1″ of the roll. (careful with the blade!)

Step 5- Insert the doily into the slit and adhere using the glue gun.
And there you have it- a paint and sticker ready tree to use in your Spring-themed class.
To Teachers:
Here’s a lovely video to use as an intro to the tree painting activity to encourage tree planting.
“Let’s Plant A Tree” by Patty Shukla
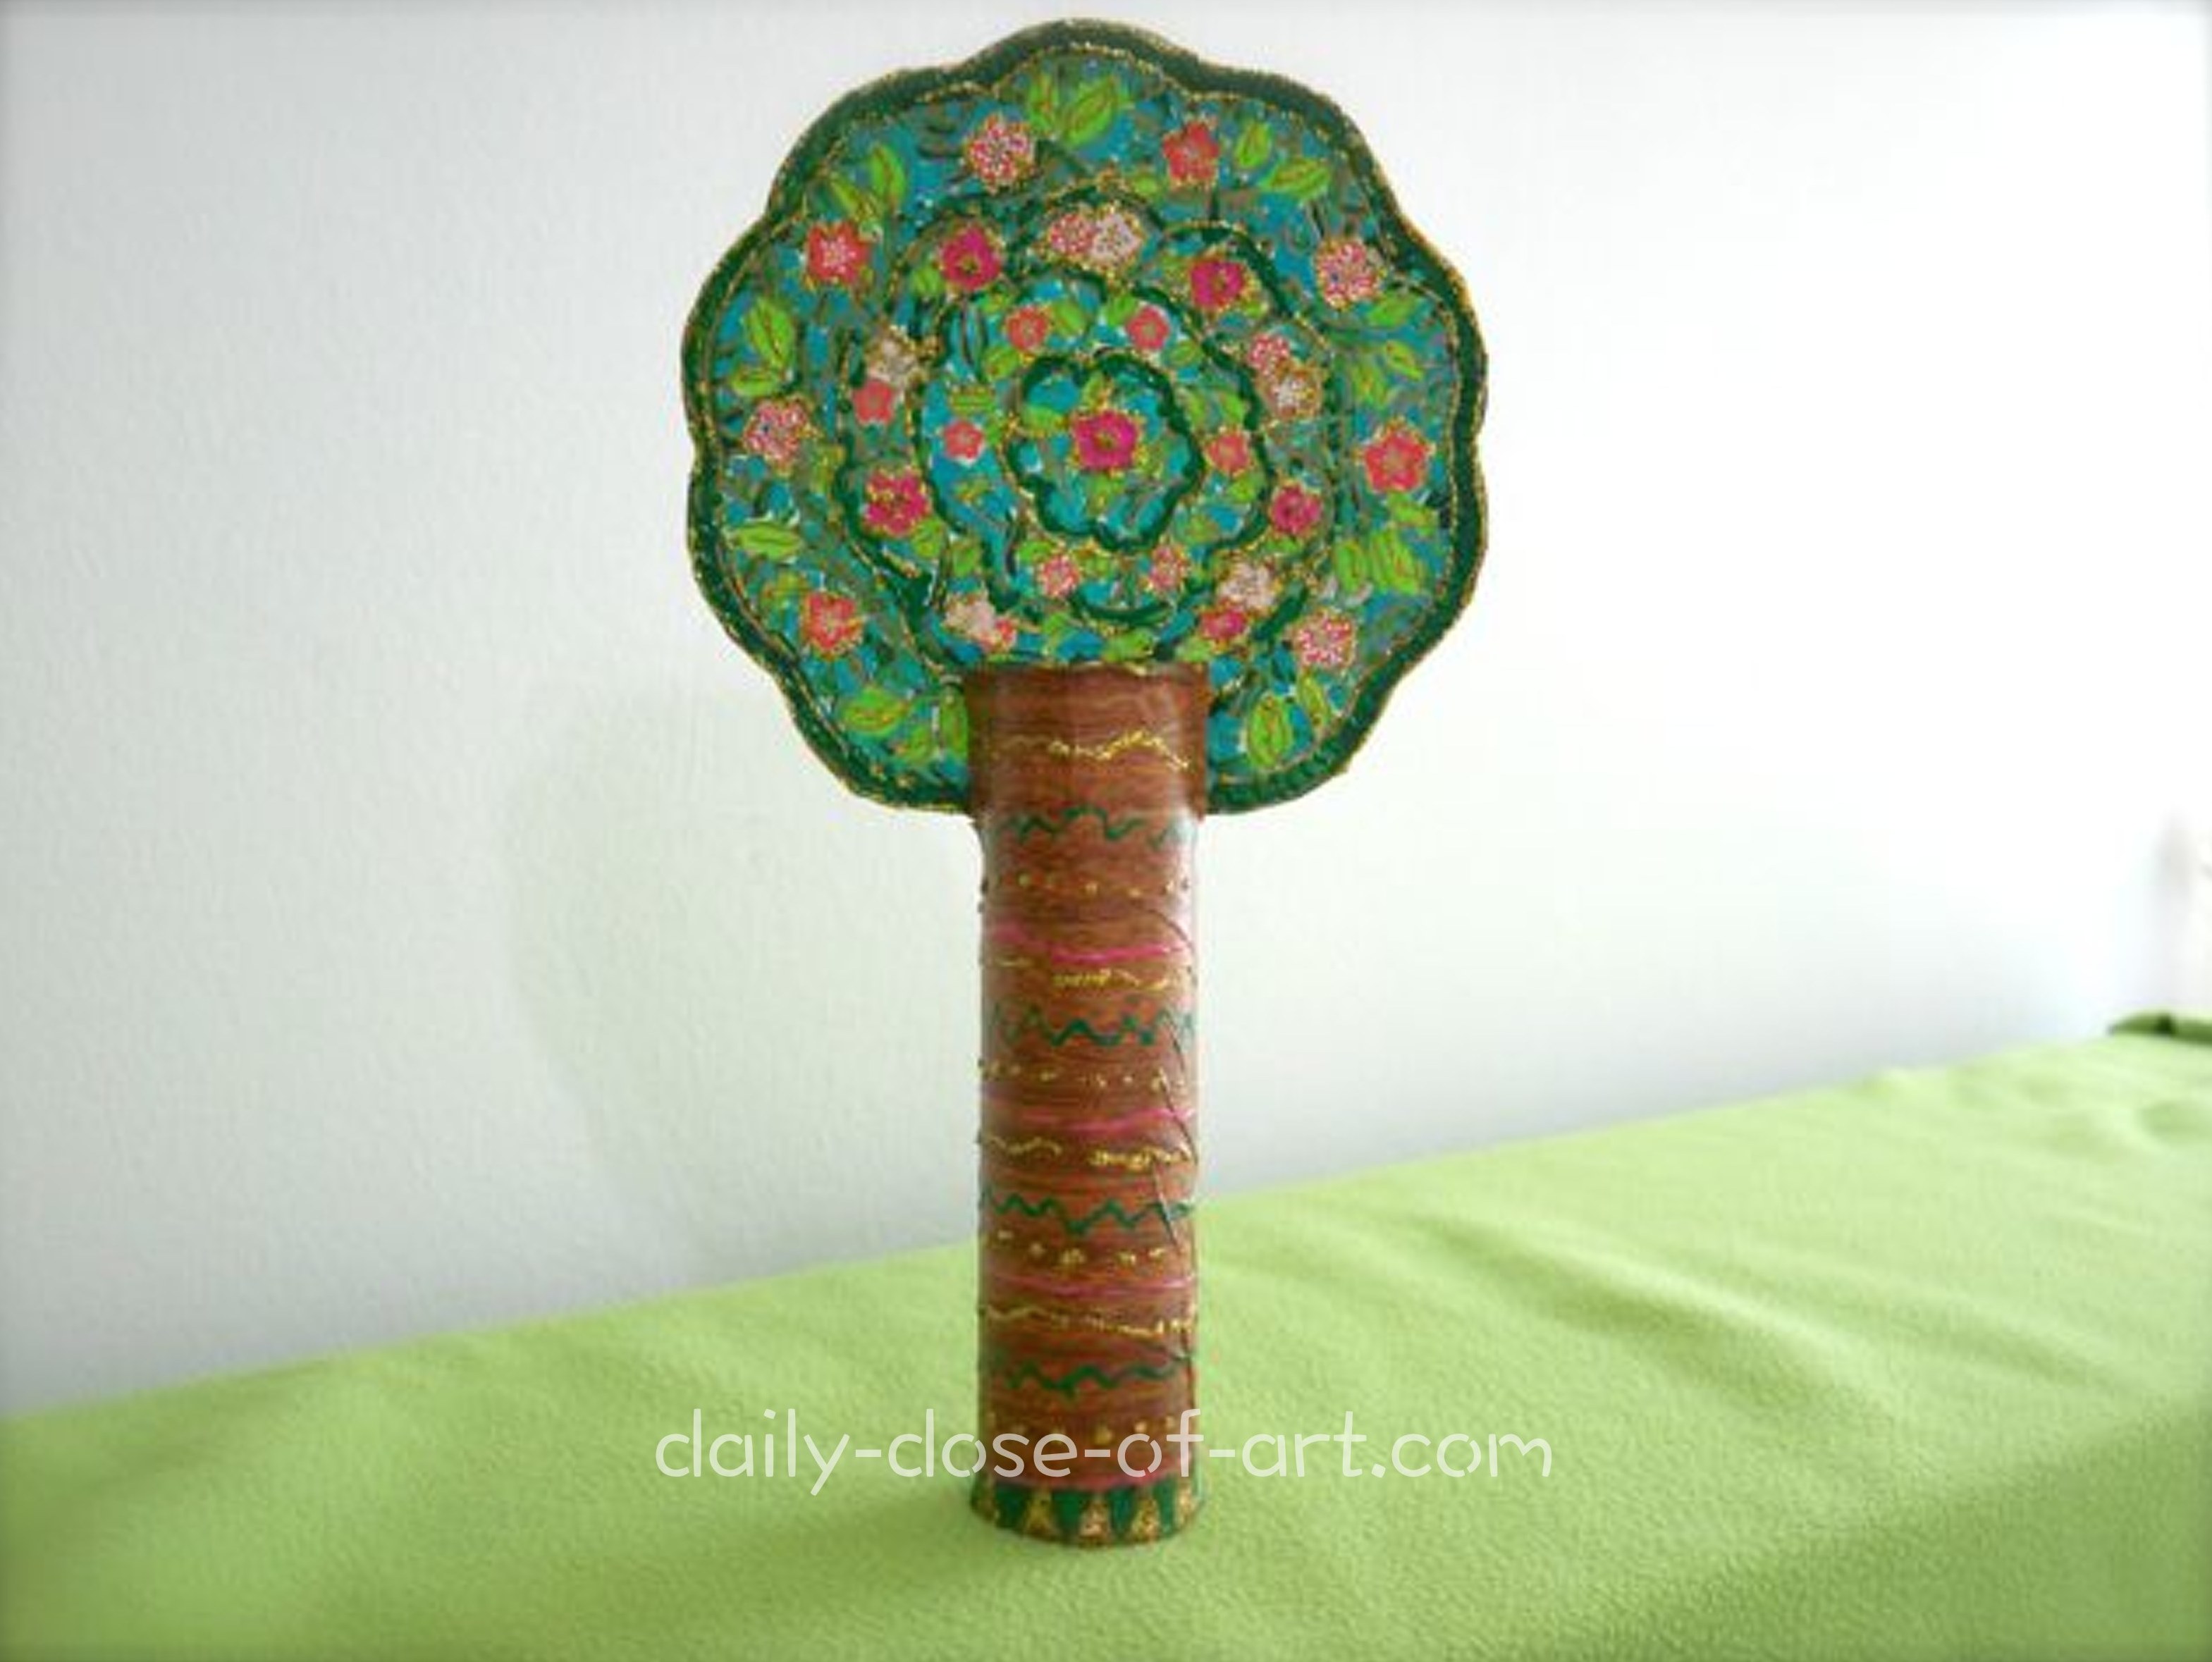
Check out my sample…
– I used Cherry Blossom stickers (aka Sakura- got them from Art Friend Singapore).
– For the paints I used: acrylic paint:3 shades of green
dimensional paint:glitter gold, fuchsia
– I wrapped the trunk with some wood-like self-adhesive drawer liner. Since my Sakura stickers have a bit of gold, I decided to spread the gold and glitter from the flowers down to the trunk.
Have fun painting and embellishing your personal tree!
SPRING ROLL CRAFTS 5: The Blooming Tree
Designed & Crafted by Paulina Constancia on Daily Dose of Art

Recent Comments