
Spring ‘Roll’ Crafts 3: The Watercan Man
Spring is a time for gardening and flowers. And yes, watering cans too! Today we will create a mini watering can using a toilet paper roll and some simple cardboard shapes.
Materials:
- toilet paper roll
- cardboard
- scissors
- glue gun
- tie-dye print on photo paper sticker
- acrylic paint: light blue, purple and white (for handle & spout), dark brown (for soil)
- white dimensional paint (like Puffy)
- 2 googly eyes
- plastic leaves and flowers
- puncture tool
Let’s begin…
Step 1 – Make the following from cardboard: 2 end covers, 1 handle and 1 spout.
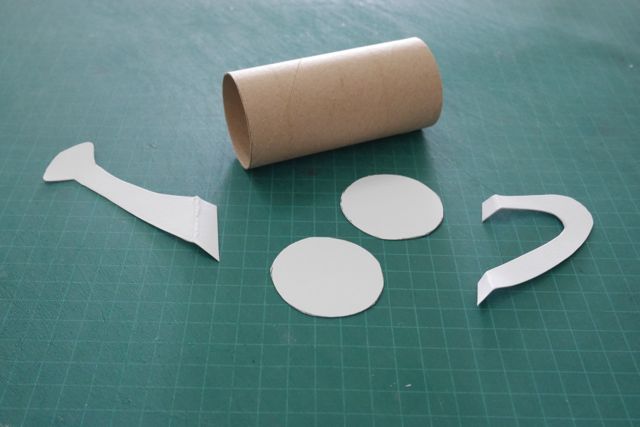
Step 2 – Glue on end covers, handle and spout using a glue gun

And there you go- you have just created a basic paintable watering can. Ready to go for your Spring-themed art class. Start imagining the possibilities…
*Note: It is important to put something inside to give it a little weight; otherwise, it’s too light to stand on its own. It could easily be blown away by the wind. So, just before you glue on the top cover, you can put in a little bag of sand or perhaps some Mung beans to give it a little jiggle.

To TEACHERS: Suggested intro video for the kids to watch before painting The Watercan Man.
“PLANT LIFE CYCLE” on turtle diary
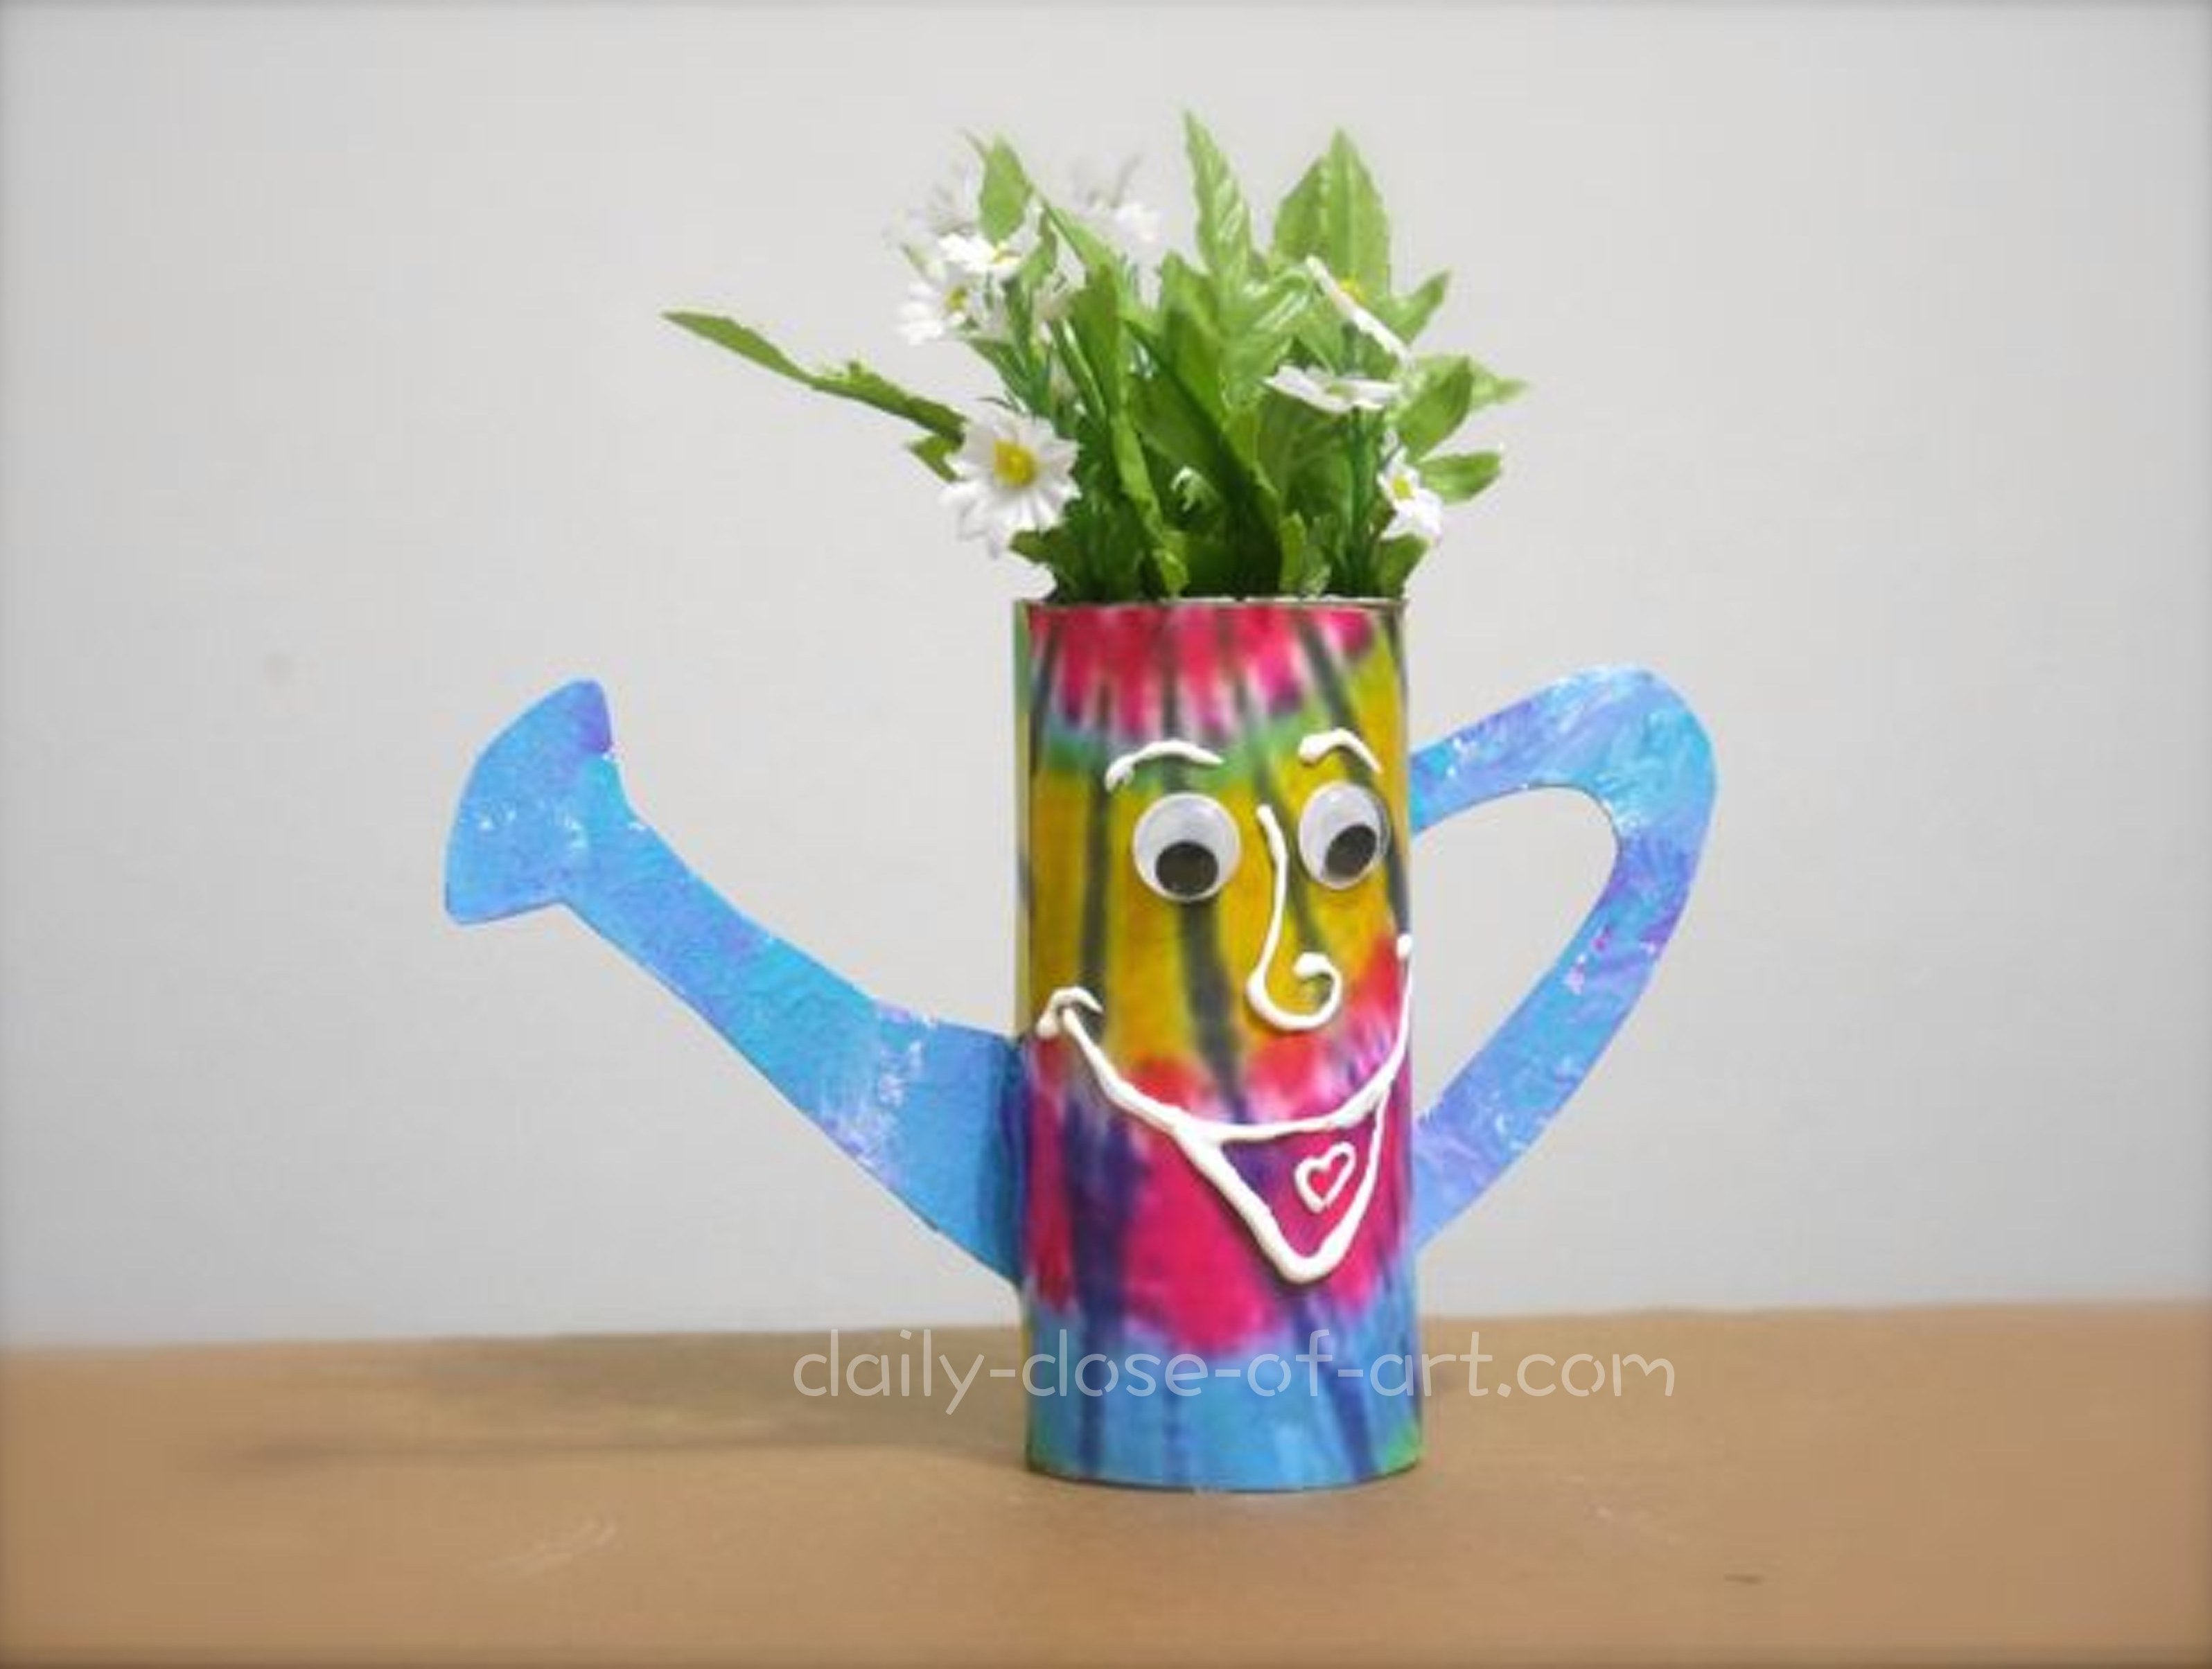
Meet “Psiquedélico”, My Watercan Man
SPRING ROLL CRAFTS 3: “The Watercan Man”
Designed & Crafted by Paulina Constancia
on Daily Dose of Art
Here’s the making of “Psiquedélico”:
1- I printed a tie-dye image on glossy photo sticker paper and then wrapped it around the roll. It’s a little tricky when the spout and handle are already attached. So better to decide early on how you want to decorate the roll.
2- Using a sturdy stencil brush, I dabbed layers of white, light blue and purple acrylic on the handle and spout.
3- I used white dimensional paint for the details on face.
4- I painted the top cover with dark brown paint to mimic soil and allowed it to dry completely before puncturing holes.
5- I inserted plastic leaves and flowers into the holes and adhered them using a glue gun.

Recent Comments