
Kids’ Rub Art 4: Patterns
Today we’ll make an exciting variety of pattern strips that will bring unlimited rubbing and printing possibilities. Remember not to be frustrated the first time you try it. You will have to experiment with different textured plastics to see which ones render the effect you want. You will also have to try the finished strips using different media – coloured pencils, crayon or paint.
Materials:
- textured plastic (ex.containers, trays, mats, etc)
- scissors
- plastic foam board
- metal ruler, cutting knife (to cut board)
- glue gun
Let’s begin…
Step 1 – Cut 3 (or more) foam board strips. (about 6″ long, and the width of your metal ruler) Set aside.
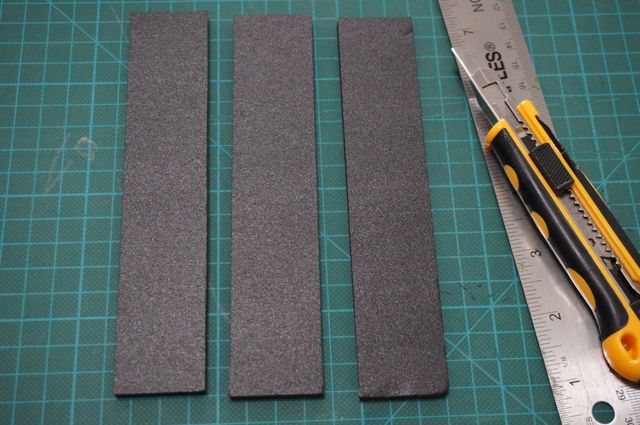
Step 2- Choose from your array of disposable (or extra) plastics lying around your house. I used the ff (L-R): Gardener’s pot bottom net, placemat (from Tues project), and corrugated foam board

Step 3- Adhere the textured plastic onto the pre-cut foam board strips.
And there you go – you just made a nice array of textured plastic strips. Try making an impression now.
(Don’t worry- your first will not be the last, hahaha.)
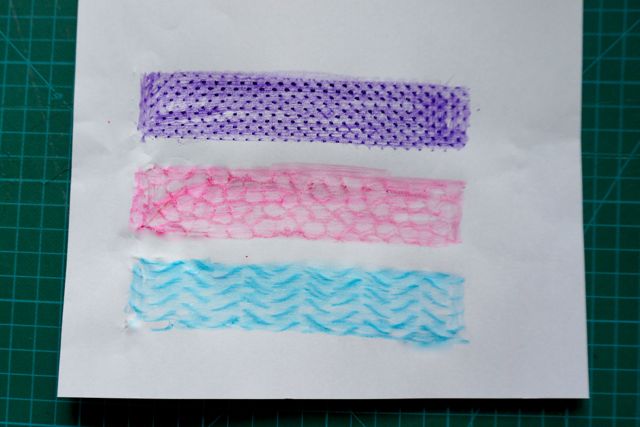
Option 1: use coloured pencils or crayons
(Note: Best to use a clipboard: tape strip on board and clip paper to facilitate rubbing)
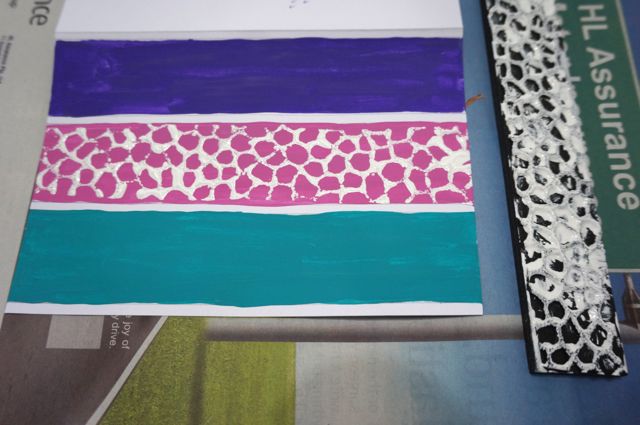
Option 2: You can also use it as a stamp. Apply paint directly onto strip and press onto paper.

* Here’s the first strip and its print.
Kids’ Rub Art 4: Patterns
Project Concept & Execution by Paulina Constancia on Daily Dose of Art
* Here are the three patterns together.
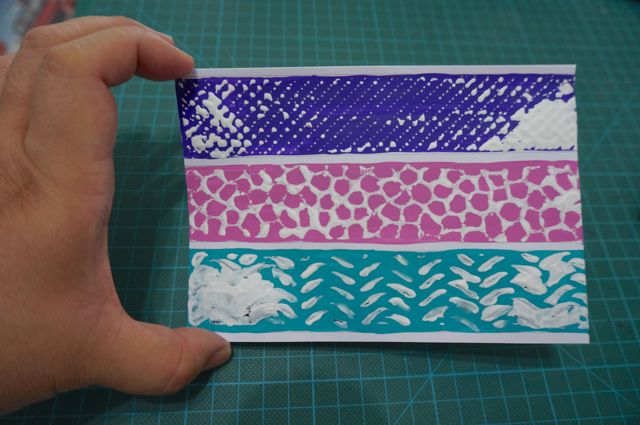
Too much paint? Not enough pressure? As I said it’ll take several tries to get to know the effects you can create with your brand new pattern strips.
Have fun with your design adventure!

Recent Comments