
Bubble Talk 2: Bubble Prints & Projects
Today we look into different ways we can print with bubbles. I share with you some tutorials. I also have some cool projects to try out after you’ve made your bubble prints.
1. Printing with Blown Bubbles on Paper Crafts for Children
*Easy to follow steps with useful tips from someone who has a lot of experience teaching the craft of bubble printing to kids of all ages; also offers four easy speedy ideas for making cards from bubble print decorated paper

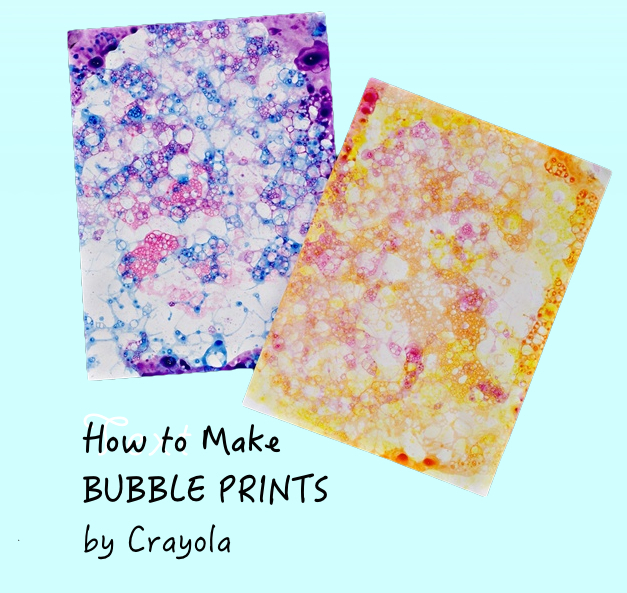
2. How to Make Bubble Prints by Crayola
*For Crayola lovers- this tutorial shows how you can put your washable kids’ paint and glitter glue to good use.
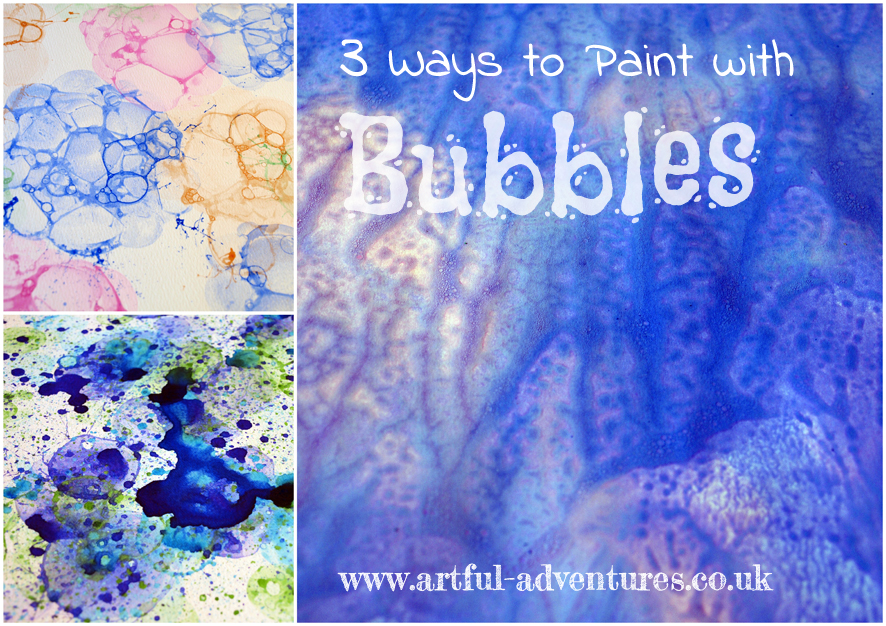
3. Three Ways to Paint with Bubbles on artful-kids
* On top of the usual press onto bubbles printing technique, this tutorial shows the use of a cardboard box and a sponge in bubble art making.
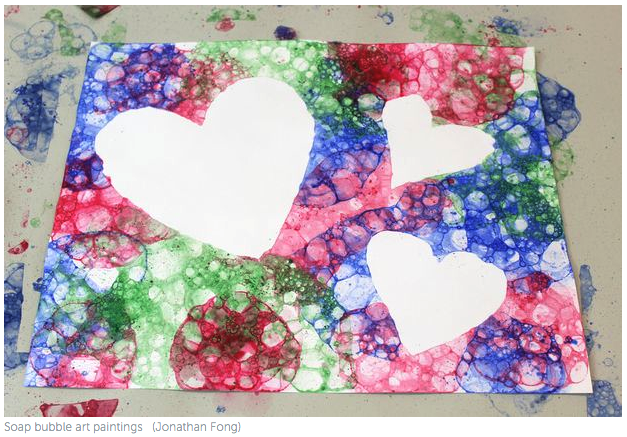
4. How to Make Soap Bubble Art on eHow
*This tutorial shows an exciting option of using cut-out paper in soap bubble art making…
So you’re done making your bubble prints?
What are you going to do with them?
Here are some ideas for articles you can make with them
whether for your own use or to give to someone special:
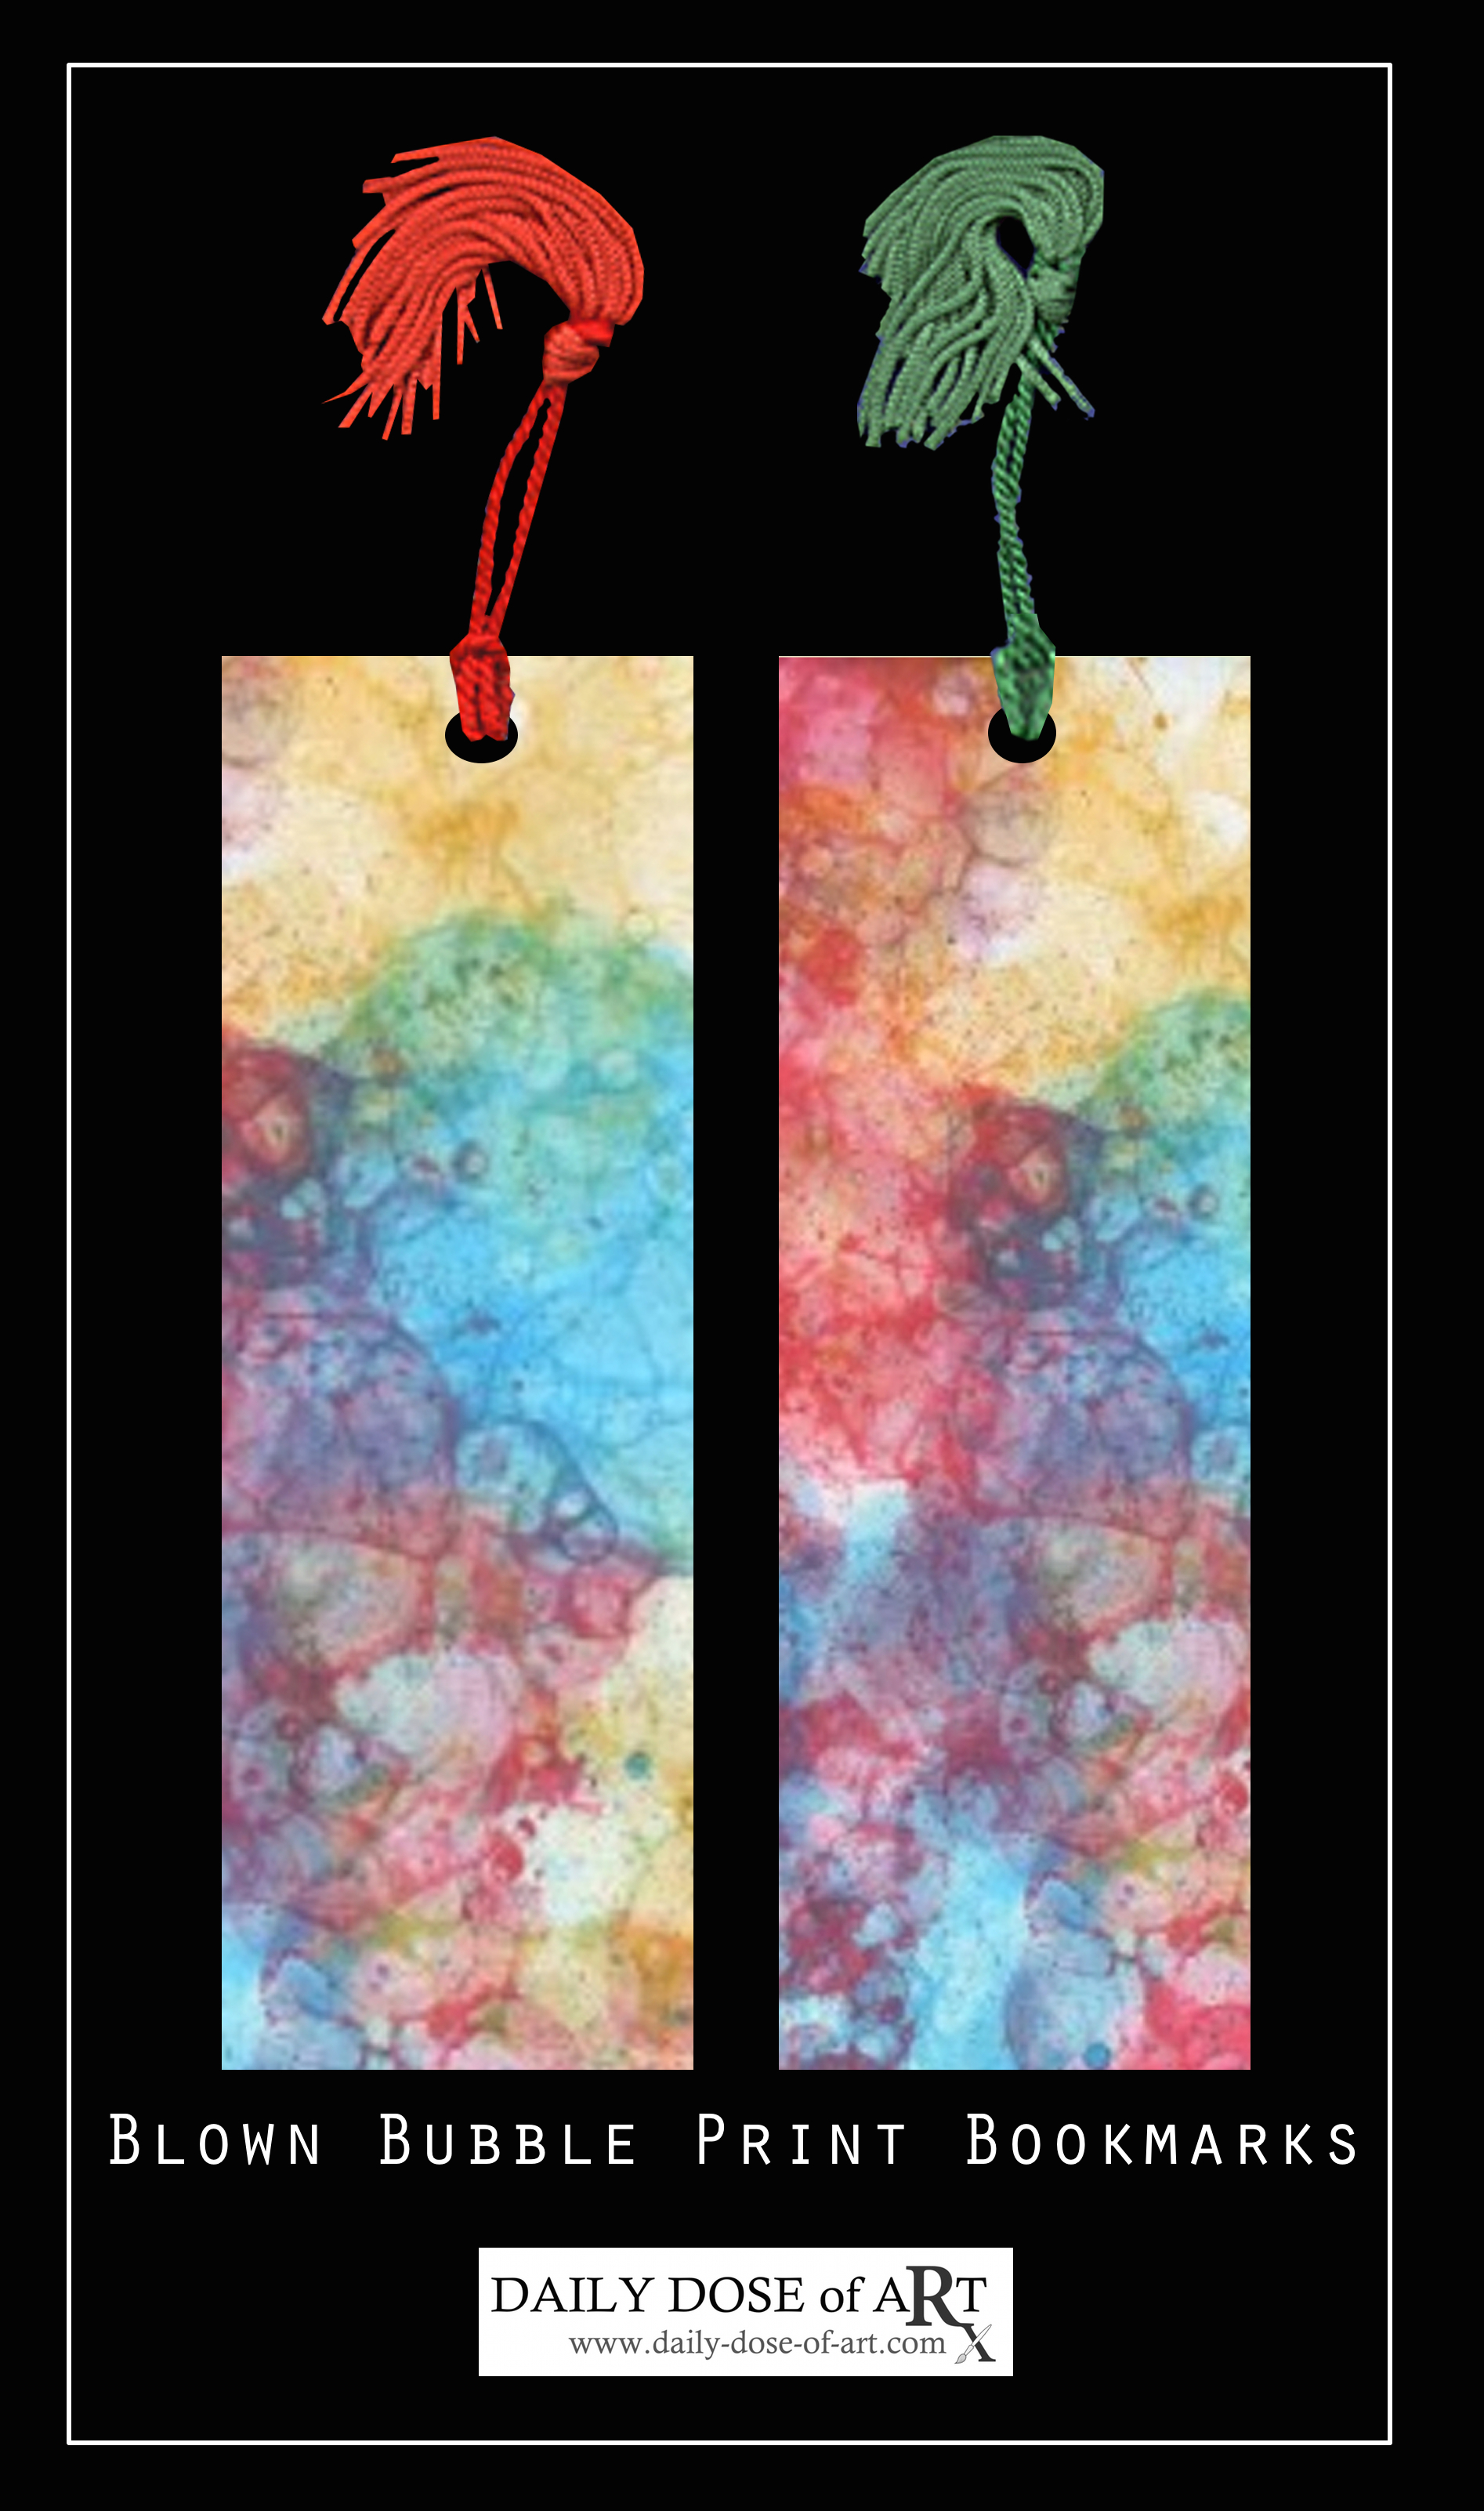
How about making bookmarks?
Materials:
bubble print
pencil
metal ruler
cutting blade or exacto knife
craft glue
single hole punch
corner rounder punch
mini tassels
STEPS:
1. Cut your prints to 2″ x 6″ size, reinforce with board paper (use craft glue to adhere)
Optional: use coordinating coloured paper in the back and laminate bookmark.
2. Punch hole , see sample
Optional: Round corners with corner rounder punch
3. Insert mini tassel (you can use yarn, ribbon, or whatever you have handy)
4. Your bookmarks are now ready for your next adventure in reading.
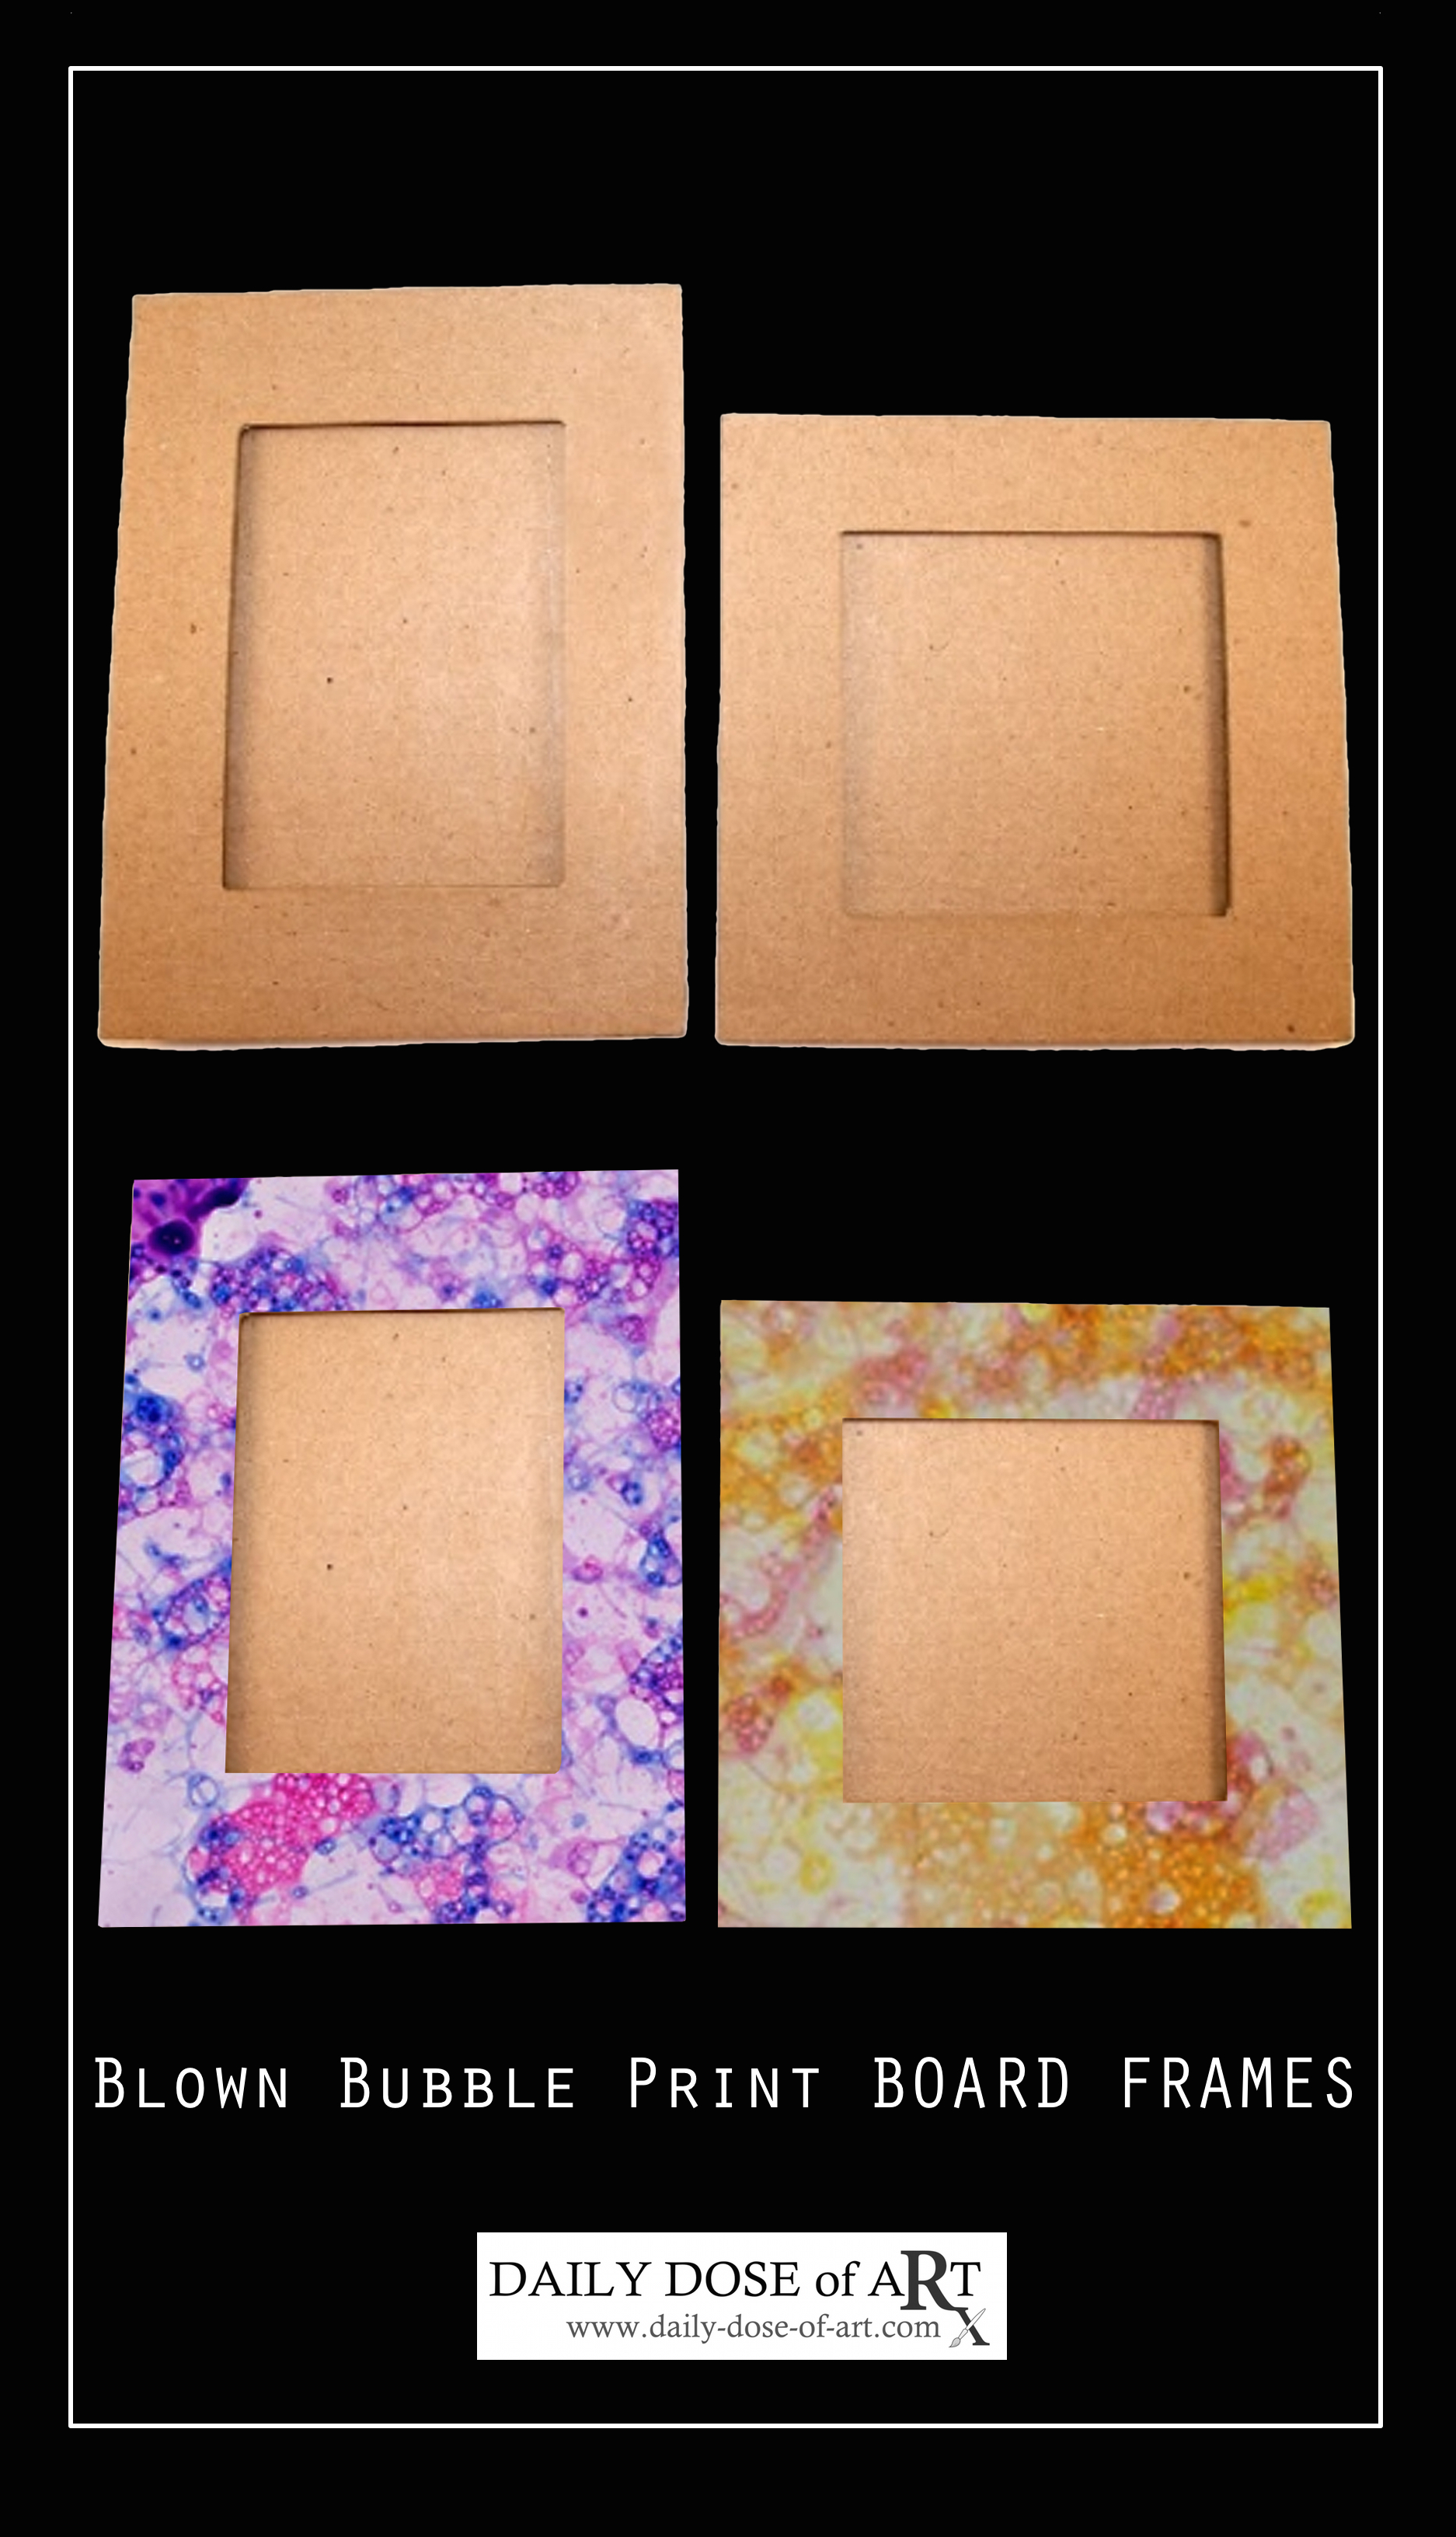
How about making picture frames?
Materials:
cardboard frame (store-bought or homemade)
bubble print
pencil
metal ruler
cutting blade or exacto knife
craft glue
scissors
optional: ribbon for hanging loop
STEPS:
1. Make your own cardboard frame base or use a store-bought cardboard frame from your local dollar store or craft store.
Alternative: Start with a store-bought matte board, cut an identical size board paper, adhere the edges of three sides leaving the top open to allow a photo to be inserted.
2. Cut your bubble print to the size of the frame.
3. Adhere to frame using craft glue.
Optional: Make a decorative loop to hang your frame using ribbon or yarn in a coordinating colour. Use hot glue stick to adhere to the back.
4. Your frame is now ready.
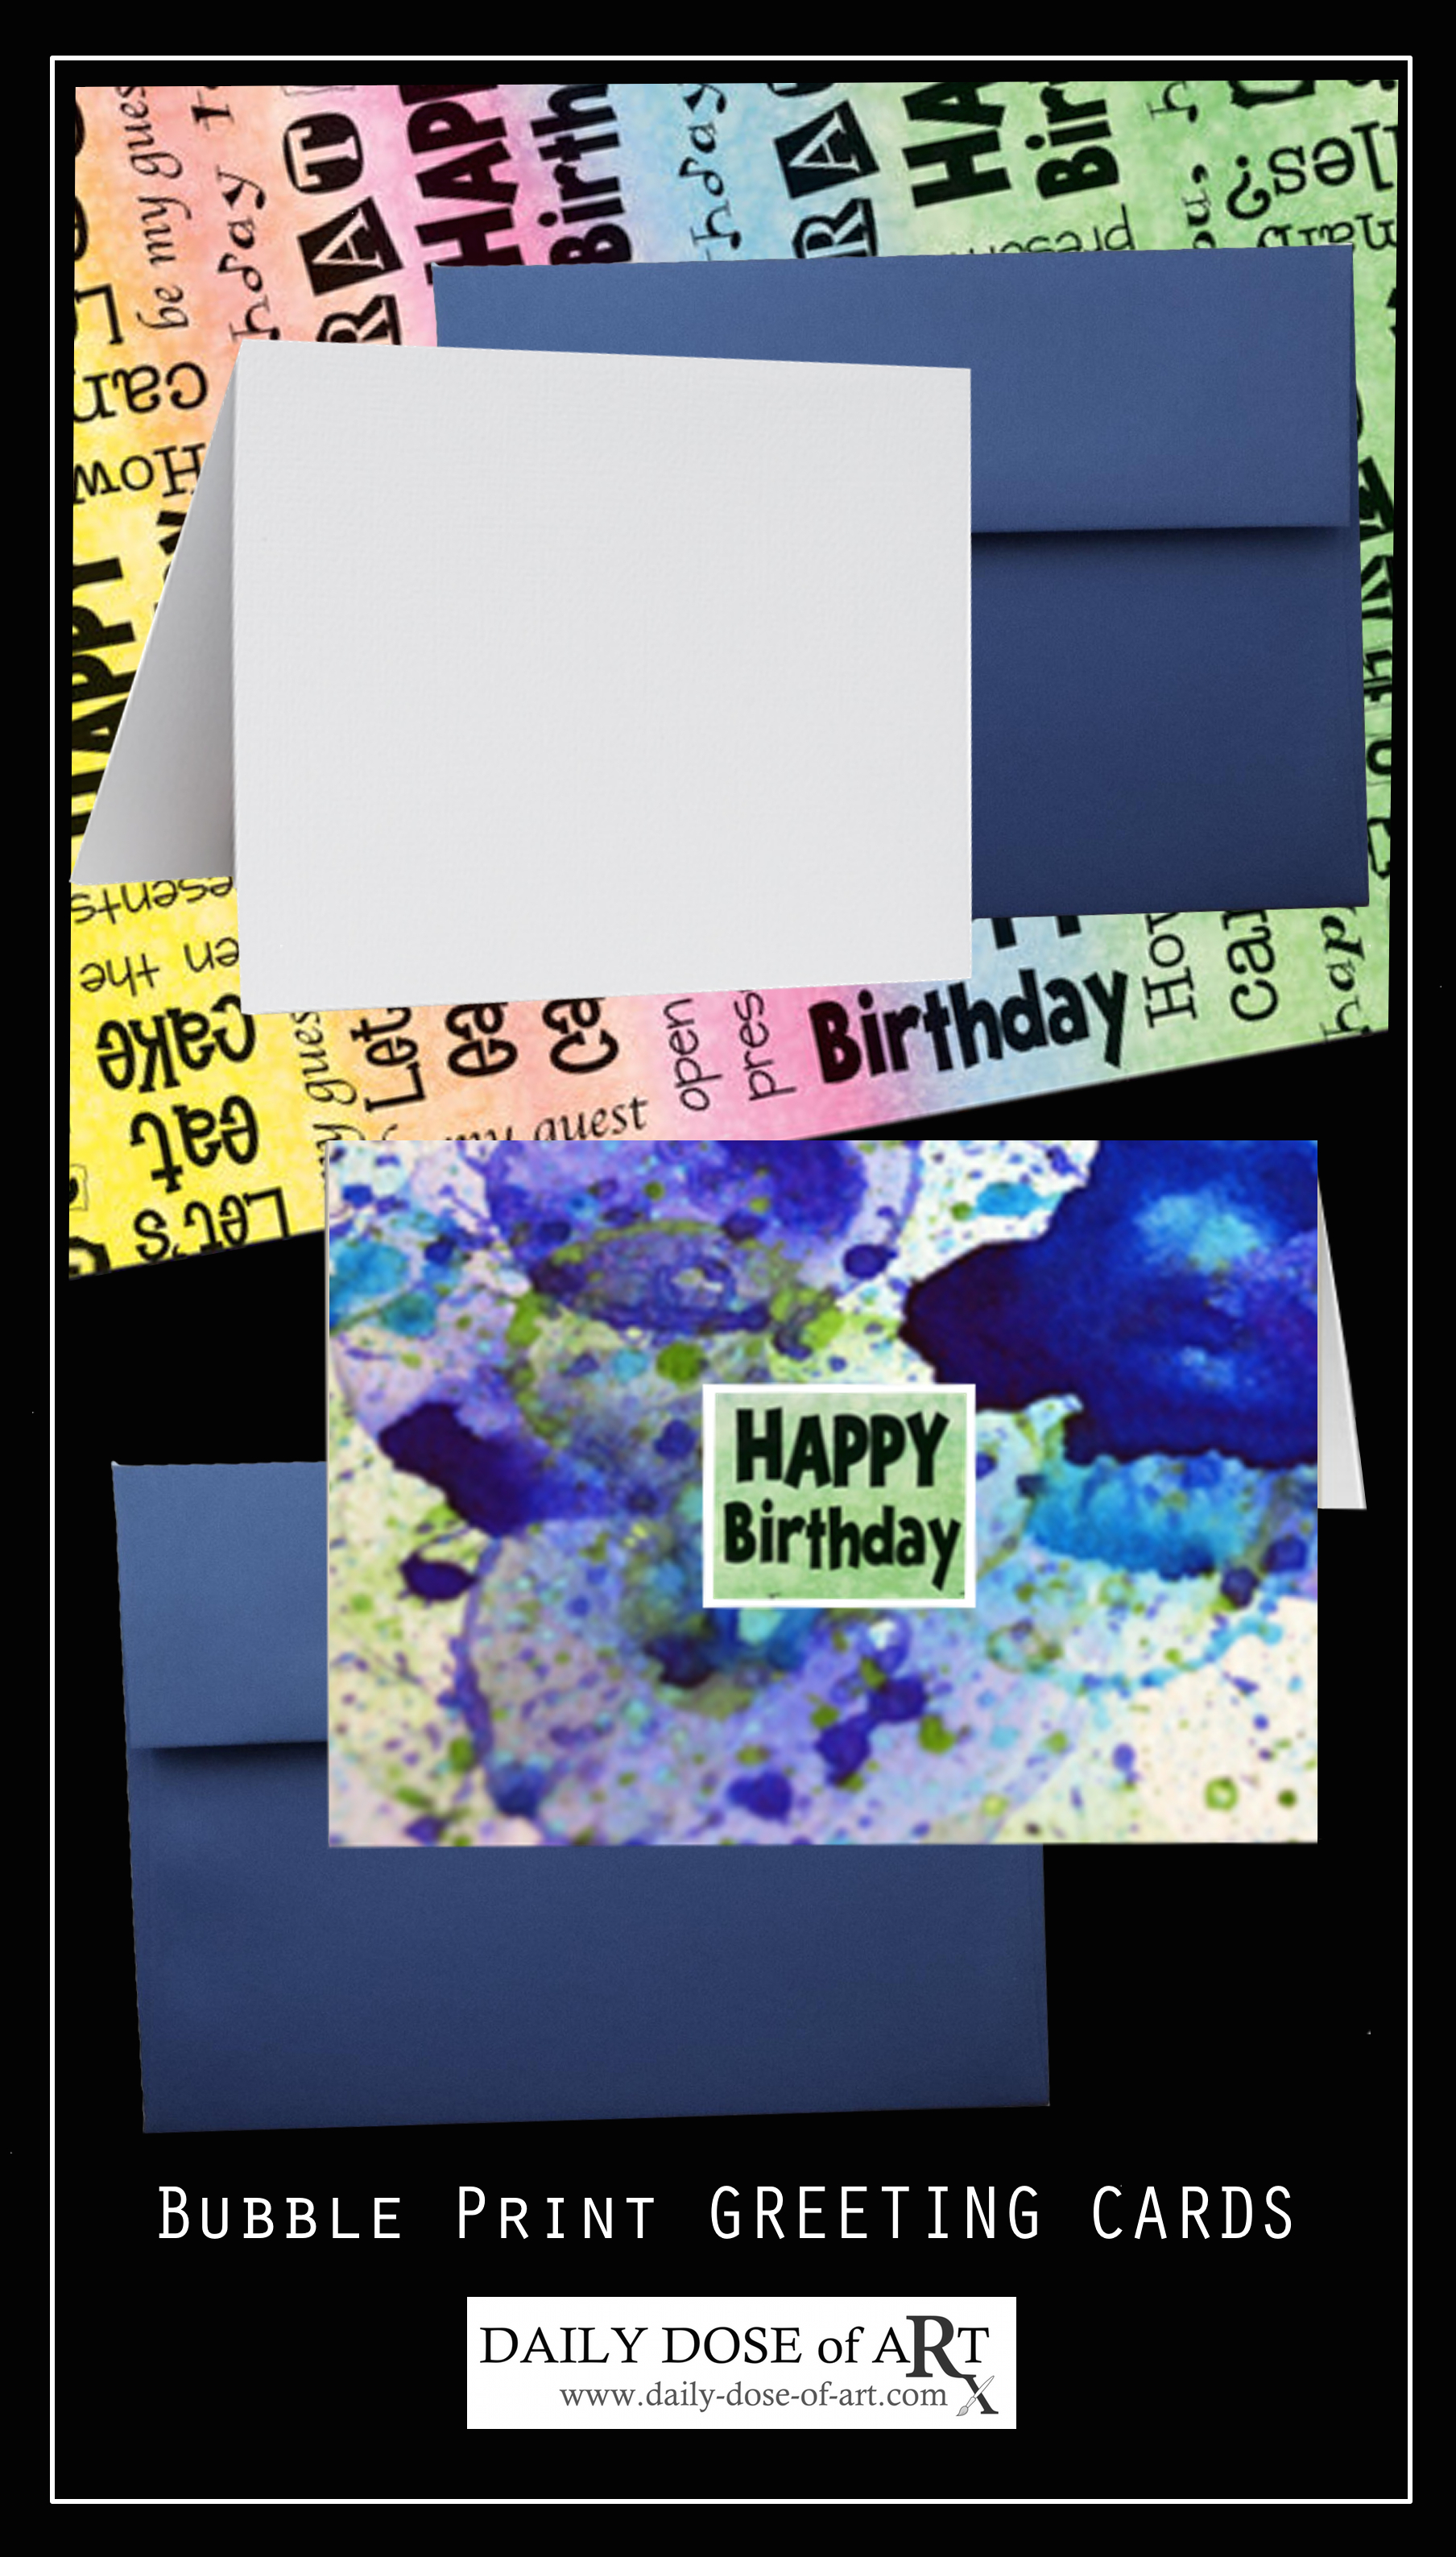
3. How about making greeting cards?
Materials:
bubble print
scrapbooking paper with Happy Birthday/greeting print
white folded blank card
envelope (to match colour of print)
plain white board paper
pencil
metal ruler
cutting blade or exacto knife
craft glue or glue stick
Steps:
1. Cut Happy Birthday (or whatever greeting you need) from the “greetings” scrapbooking sheet
2. Using plain white paper, cut a piece for the border, adhere using craft glue or glue stick. Set aside.
3. Cut bubble print to the size of blank card; adhere cut piece to the front using craft glue; then adhere greeting centrepiece from Step 2.
4. Your card is now ready to send to someone special.
 So do…as I suggest – let the art making continue even after you’ve made your bubble prints. Make something useful for yourself or for someone you love.

Recent Comments