
Sari Brooches
Repurposing Saris.I have always been amazed by the wealth of colors, patterns and beadwork that goes into saris (not to mention the amount of time and effort that goes into producing them). However, like any other piece of clothing, eventually they are retired and either end up at a Salvation Army store or the dumpster. While I lived in Calgary, they ended up as a donation to CIWA (Calgary Immigrant Women’s Association) where I volunteered alongside other immigrant women from across the globe to create unique items for their craft market. And here’s what I made—sari brooches!!!
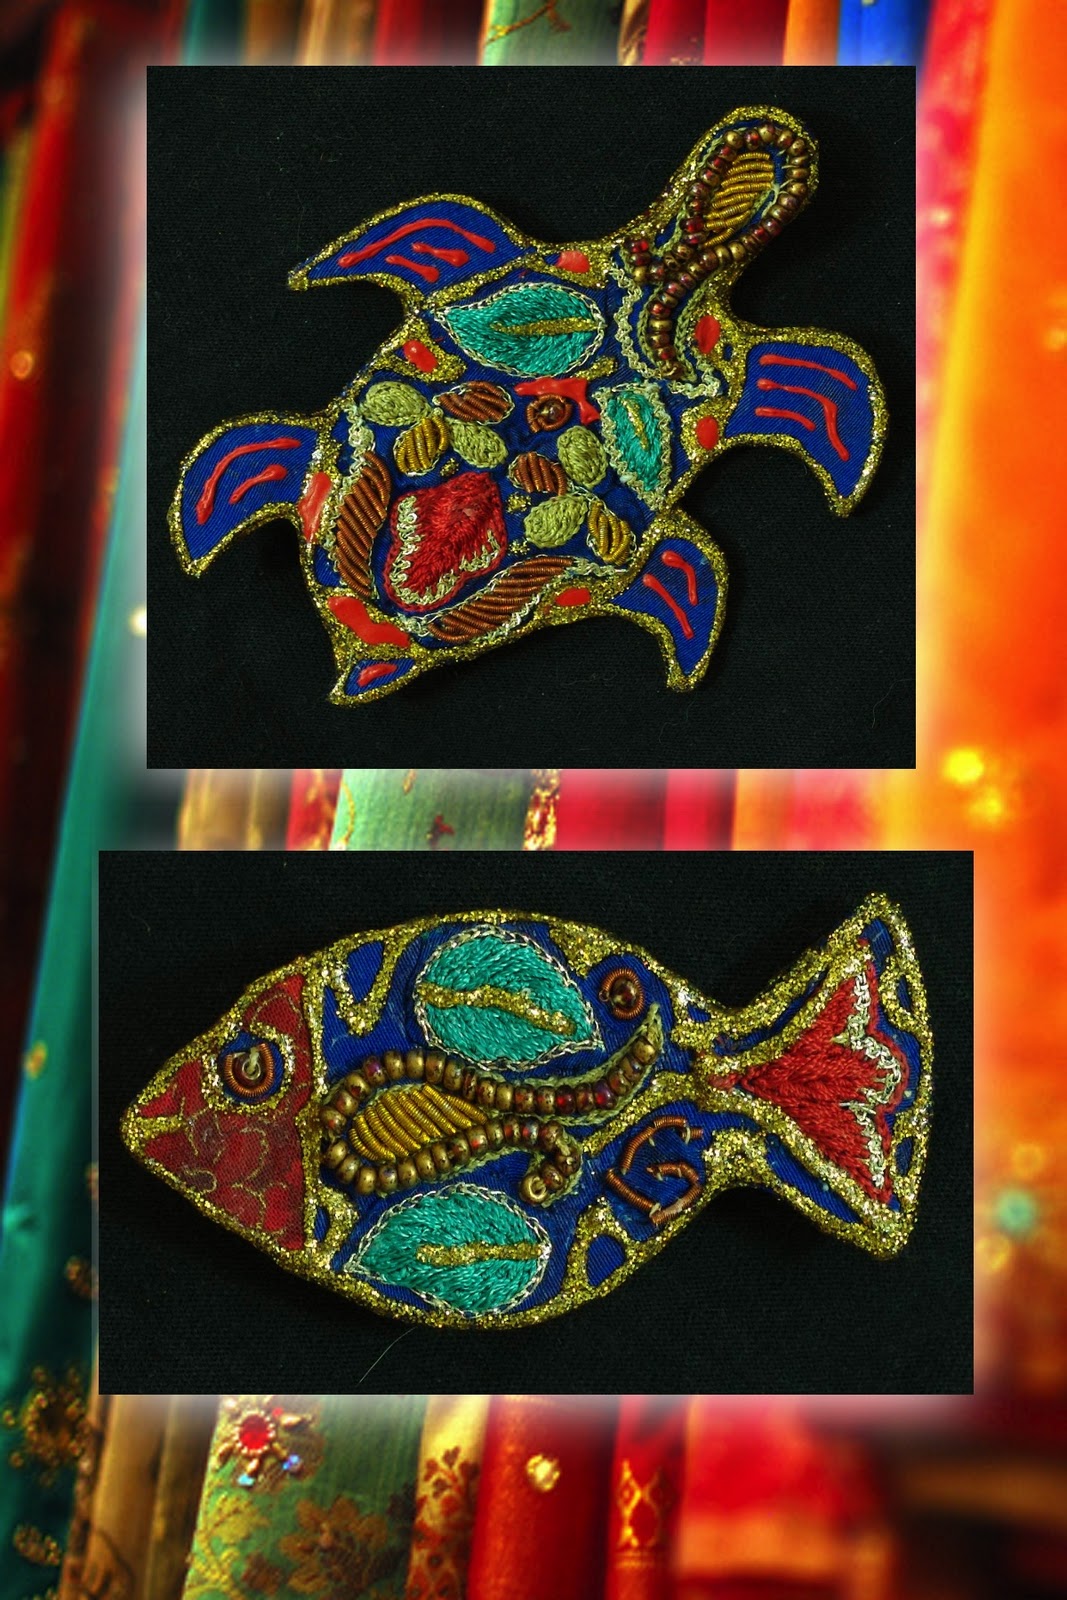 |
| “Repurposed Saris” Handmade Sari Brooches by Paulina Constancia |
You will need:
White Glue
Plain Base Fabric (preferably from the sari)
Scissors
Glitter Puffy Paint
Regular Colored Puffy Paint
Brooch Pins
Needle and Thread
Option: Patterned Fabric Swatches
- Cut your desired shape for the brooch using thick cardboard.
- Cut plain base fabric slightly larger than the brooch shape so it could be folded over and glued to the back.
- Sew (or glue) brooch pin to the back of cardboard shape. Poke holes first to guide your needle and thread.
- Adhere fabric to the cardboard shape using white glue. Pull the fabric tight so it will dry nice and smooth.
- Cut out some sari details that you might be able to use for your brooch.
- Lay out your sari details without gluing and play around with your composition. If desired, add a patterned fabric to enhance your design.
- Glue details to the base fabric and allow it to dry. Option: Glue some plain sari fabric to the back for a finished look.
- Trace edges with glitter puffy paint to complete the look. Make it thick enough to cover the area where front and back fabric meet.
- Allow the brooch to dry completely. Enjoy!
 So do… check your closet and your stack of junk at home before running to the craft store. You’ll be surprised what materials you already have lying around.

Recent Comments